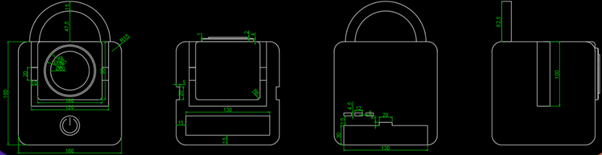
After creating a 2D design, I was tasked with converting the drawing into a 3D model using all the skills I learned from the first semester. I knew this would be a challenge, but I was more than satisfied with the result. To start off, I had to work from the 2D design (see below) and incorporate all the functions.
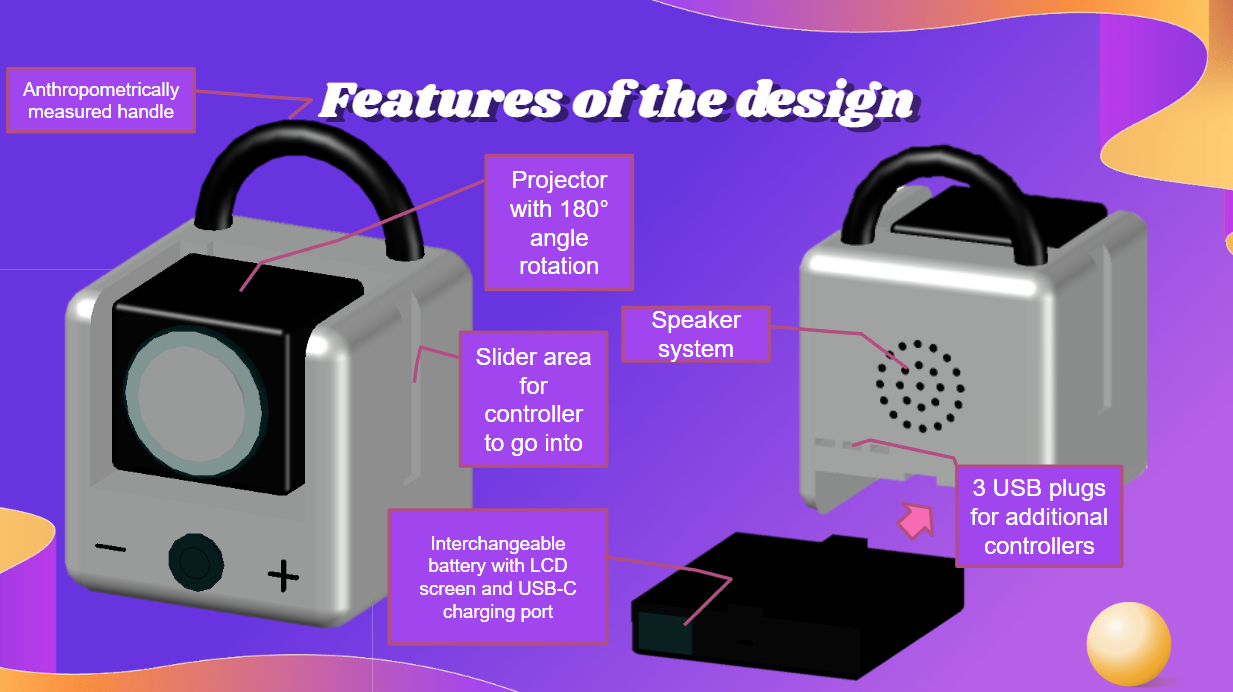
To start the 3D model, I opened a 3Diso template and drew a square before extruding it upwards to the correct measurements. I then used the fillet tool to round off all the edges. From now on I will be referring to this cube as the “main console”. Following this, I started to create the projector part of the model. To do this, I created a cube and filleted it the same as I did with the main console and then subtracted the new cube from the main console along the top edge. This left me with a large cube with all the sharp edges rounded off with a large hole in the top central area of the main console. I Then had to create the metal pole holding the projector in place. To do this, I created a circle on the left side of the newly made gap in the main console and drew a line connecting the sides together. I then used the extrude path tool to connect the circular metal pole to both sides of the cube. From here, I made another cube and similar to before, fileted the edges. This cube would become the projector. I then levelled it and moved it into the gap, connecting it to the metal pole. I then created the lenses of the projector by drawing circles on the front face of the newly made box and then extruded it slightly outwards before repeating the process 2 more times for the other projector lenses. To finish off the front of the main console, I used the circle tool on the bottom of the front face and extruded it outwards to create a power button as well as drawing basic + and – shapes using the line tool and then using the surfpatch tool and extrude tool to patch and extrude them outwards. I then created the handle of the console by changing the UWS to my preference and drawing a circle towards the back of the top face of the main console. I then cut off the circle where it went into the console itself and drew another circle where the newly cut semi-circle touched the top of the console. It was then a matter of using the path extrude tool to finish off creating the handle. The next part of the console was inserting the slider area for where the controllers would slide into. This part was rather easy as all I had to do was create a rectangle where the sliding area would be and subtract it from the main model before repeating from the other side. I also had to do work on the back of the main console by adding both a speaker and three USB ports. The speaker was rather easy as all I had to do was draw three circles, one on top of the other, from the centre of the back face and extrude them slightly before using the polar array tool to finish the speaker off. The USB ports were a bit more difficult as I had to research the size of the ports before making the same sized rectangle in the model space. I extruded the rectangle up accurately and then copied it 3 times. I then put these 3 rectangles inside the main console and subtracted them. The final part of this model was creating the battery. This wasn’t too difficult as all I did was create a rectangle, extruded it upwards and filleted the bottom edges. I then added the top slider portion to the battery. After this, I copied it and pasted it to the side. This is because I took the original battery and inserted it into the main console right at the bottom before subtracting it. This created the gap in which the battery would slide into. The final parts were adding an LCD screen to the battery which would just be a matter of drawing a rectangle on the front face of the battery and extruding it outwards slightly. And last of all was adding the USB type C port to the battery (as this is how the battery would charge). To do this, I drew out the shape of the front of a USB C port with the line and circle tools and then extruded it upwards and rotated it, so it was facing forwards. I then just had to subtract this shape from the battery model. After this long process, I have inserted my slide from the mobile device project below to show off the completely finished model whilst highlighting all of its features.