For my individual first semester project, I decided to go for the heritage building 3D print project. I decided to do this as I was interested in the idea of 3D printing and wanted to learn more about it whilst expanding upon my 3D CAD skill. My design process can be seen below:
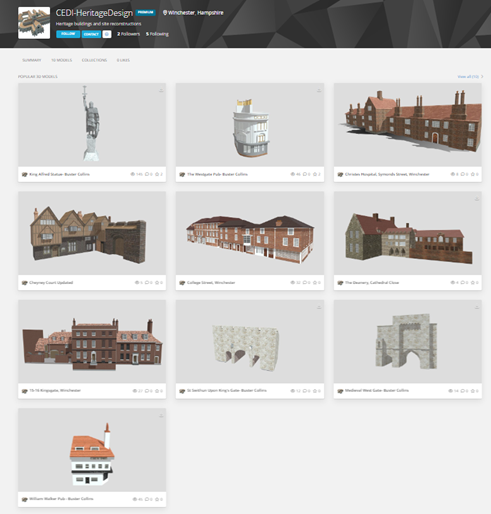
Firstly, I went to the Sketchfab website and found all the heritage models and after creating a Sketchfab account, downloaded the models as FBX files on to my computer. (https://sketchfab.com/CEDI-HeritageDesign)
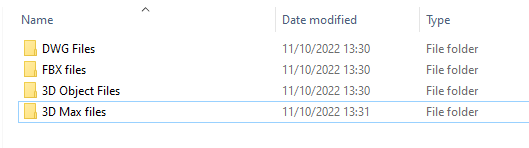
Once I received these files, I created separate folders for keeping all file types in just in case I needed anything from them after converting to DWG files.
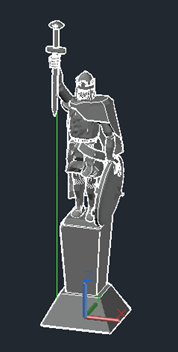
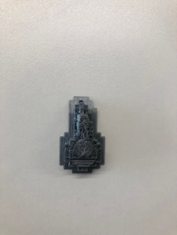
I then went through all the FBX zip files to find the source 3D objects (King Alfred statue seen below for example).
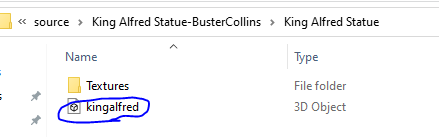
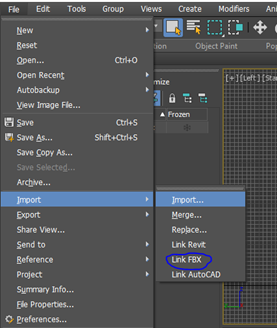
I put this “3D Object” file type into the 3D object folder I created earlier and repeated for all the other FBX models. After this, I opened up Autodesk 3DS Max and attached the FBX (3D object file) using the column as shown here.
The 3DS max file was very helpful in showing all aspects of the model and showed it in 4 displays of different angles and styles.

After exploring 3DS Max for a while longer, I saved as a 3DS max file and put it in the corresponding folder and then repeated for the other saved 3D object files. To get these models into AutoCAD, I went on to each individual 3DS file and used the drop-down menu settings to export:
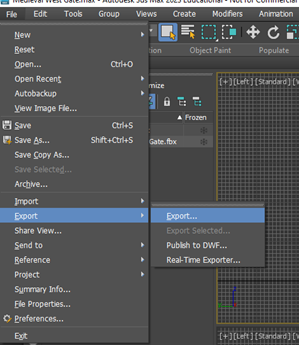
Once clicking the export menu, I typed in the model’s name and converted the save as type to DWG and repeated for all the other models.

Opening this on AutoCAD was as simple as clicking open and then selecting the model files. I also had to click the gear in the bottom right corner to change to 3D modelling for easier editing.
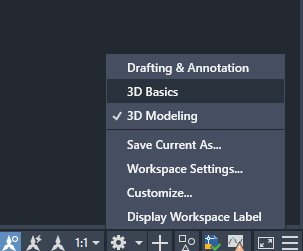
By doing this, I now have access to 3D tools which will be essential to editing the models.
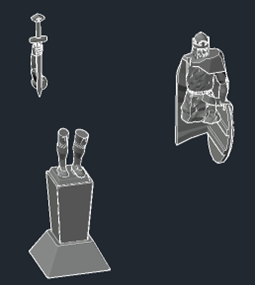
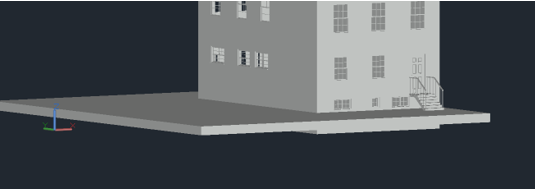
The next step I took was a bit of a strange one. I copied all of the models into a 3D space to get a semi-accurate look at which models have already been scaled and which ones will need scaling up/down. The screenshot below shows the result of this:
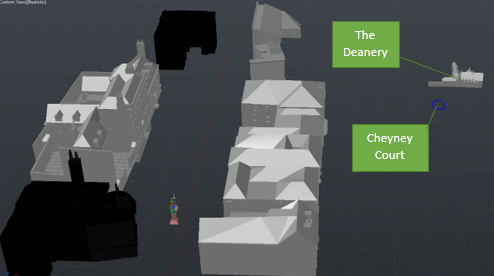
From this image I can clearly see that some of the models would need more scaling than others. However, I decided to scale all of them just to be on the safe side. To do this, I used the King Alfred statue model as a focus point and worked off that to get all models to an accurate size.
To begin this, I got the king Alfred model and drew a line that would go from the base of the model to the top, this line would be measured to give an accurate length of the entire model.
The measurement came out to be 264.1237mm. Rounded to 1 decimal place, this became 264.1mm. Comparing this to the actual real life king Alfred statue, which is exactly 40 feet, I converted both of these figures into cm leaving the model at 26.41cm and the statue at 1219.2cm. By dividing the statue height by the model height and rounding accurately, it gave me the final scale of 1:46.
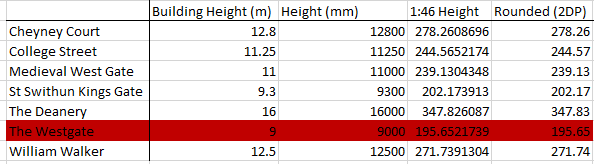
The next thing I did was email my lecturer to get all the building heights that I would need for the models. Once I had received these, I put them all into an excel table and put in the accurate formulas to give me the final heights of what each model should be. At the time of this write up, the Westgate’s height was not completely confirmed so I decided to leave it until I had a more accurate reading.
Once all of these models had been scaled, they were ready to further edit. This was by far the most challenging part of the project as it would require a lot of tweaking and time with the software. I decided to start off by just doing the King Alfred Statue as a test before editing the other models. Luckily for me, the statue model did not need editing in any way and was ready to print. To do this, I had to reupload the DWG models into 3DS Max and export them as STL files. By doing this, they would be ready to put into the next piece of software. If I were to export as an STL straight from AutoCAD, the model would come out smoothed over and very unsuitable for printing.
After some research, I decided that I would use Prusaslicer to print off the models. This software shows what the model will look like before printing as well as how it would print so I decided that this would be the best way to go.
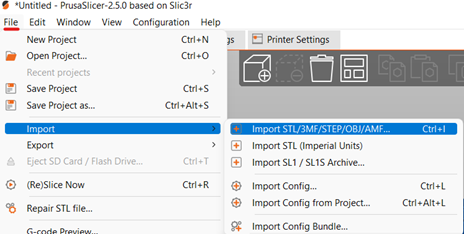
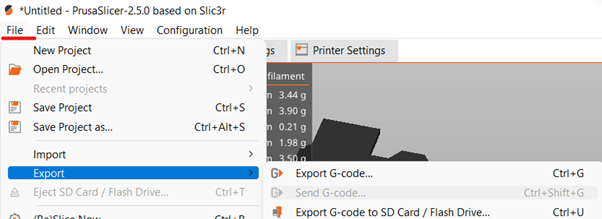
To start the printing off, I went into Prusaslicer and with the technician’s assistance, set up the software so it was ready to use with the 3D printers provided. I then followed the menus as seen below to import the correct STL file.
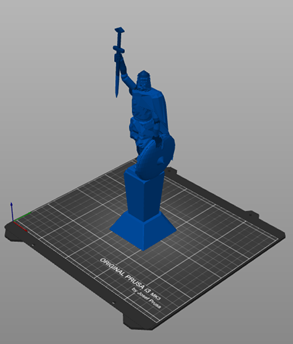
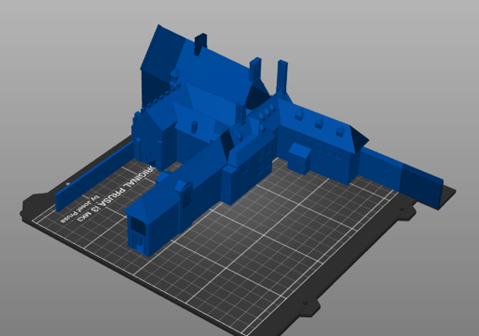
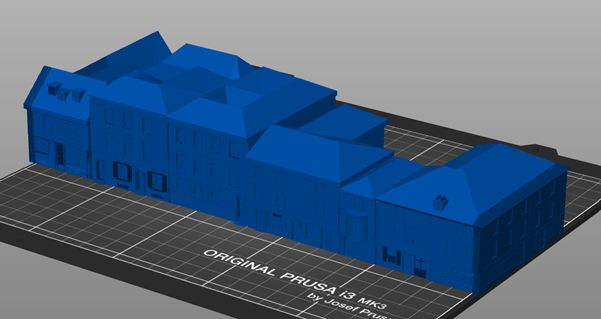
Once in the software, I knew this print would not work straight away as the model itself was huge in comparison to the printing area.
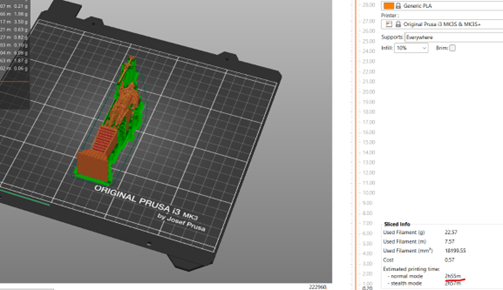
To fix this, I scaled the model down to 50% and flipped it 90 degrees on the X axis. By flipping it, it would reduce the printing time significantly and use less material for structuring. I then pressed the “slice now” button which is essentially a print preview. The result of this can be seen below and gives a print time of 2 hours 55 minutes.
I then had to export this as a “G code”. This code is important as it is recognised as the 3D printers. After getting this code, I exported it on to an SD card by using the menus similar to how I imported the original model.
With this done, I put the SD card into the 3D printer and selected my file. This would start the printing section.
Unfortunately, the first attempt didn’t come out incredibly and malfunctioned around 20 minutes in. The issue was that the plastic that was printing wasn’t at a high enough temperature and messed up whilst the base was being outlined.
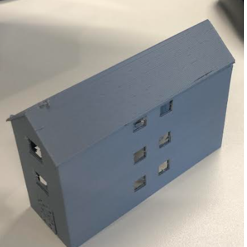
I fixed this by upping the temperature that the plastic came out. This left the model looking like this:
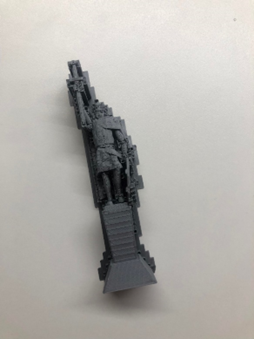
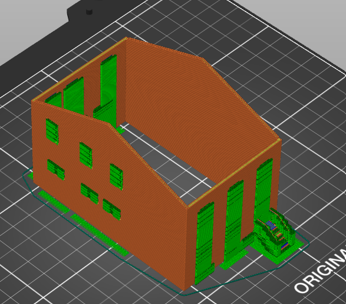
Once this was printed I noticed a new issue. All of the structures were near impossible to remove from the model due to some parts being simply inaccessible without removing parts of finished print. This was an issue as the structures being attached to the model made it look rough and unfinished. To fix this, I decided to try and print off the model in multiple pieces:
I also knew that I would have to print at a new scale as after testing the other buildings, I saw that none of these would print properly at 50%. Due to this, I decided to print off all models at 25%. This ulitmately did not work in the end for the King Alfred statue due to the model being way too small and fragile. The pieces were literally falling off after I was finished taking away the structures.

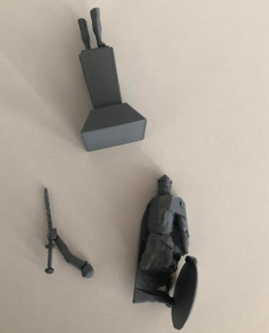
In the end, I made the decision of printing the King Alfred model off at the original 50% scale whilst printing in separate pieces. This would make it slightly bigger than most of the other models, but it was the only possible way I could get it printed off. I also had to make the decision to keep the other models at 25% as they were less specific than the statue model but were too large to print at 50%. By doing this, the King Alfred Statue would be like a slightly enlarged standout piece.
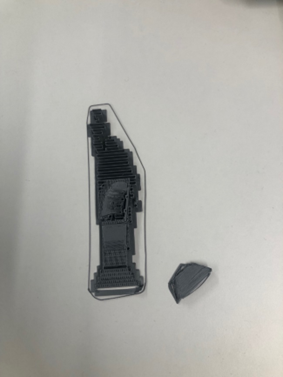
The result of changing in size and printing in pieces came out much better as I now had three pieces that could be easily glued together:
With this model finally being completely printed, I could learn from this to get the other models printed as accurately as possible. Unfortunately, due to this reason I had to cancel some of the models due to certain complexities.
Cheyney court was too large to print regardless of how I rotated it as the previewed time was too large. The 3D print lab would only be open during the university operating hours (09:00AM – 17:00PM) which only gave me a max time of 8 hours per print. This model was also very difficult to edit and could not be separated into pieces that could be printed individually.

The Deanery, similarly to Cheyney Court, was way too large for printing and also could not be cut into pieces. The model would not even fit on the bed at 25% of its original scale.
College street was the last model that could not be printed. This model had the same issues as the other two and was just simply unprintable.
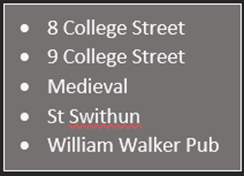
Luckily, I could still print two of the buildings from college street as my lecturer had the files and building heights to hand over to me. These being 8 and 9 College street. This left me with the following buildings to be printed:
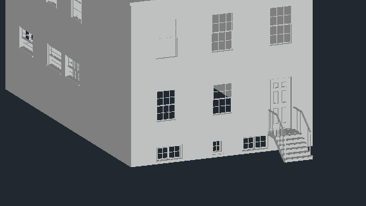
8 College street by itself was quite a large print and would’ve taken 18 hours. One of the main reasons for this is that there was a large wall in the back garden area. To remove this was as simple as just clicking on the object and deleting.
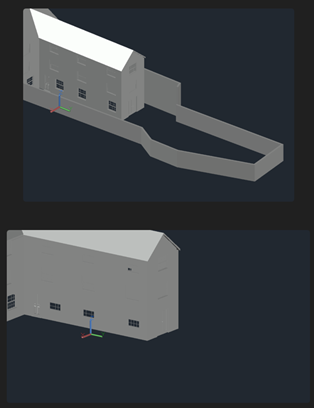
I opened this in Prusaslicer and this reduced the time down to 16 hours. This still wasn’t ideal. To counter this, I separated the building into two pieces that I could print on the two printers at the same time. By printing both pieces upside down, the print time went down to 4 hours and 40 minutes for part one and 5 hours 36 minutes for part two.
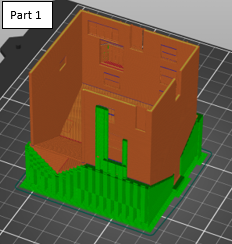
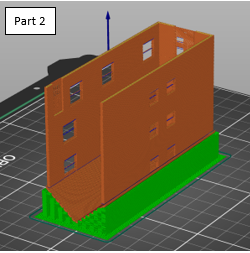
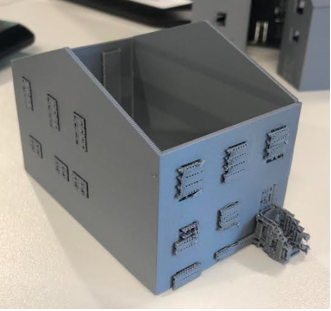
In the end the print came out slightly larger than expected. This may be an error with the building height I was given. Other than this, both parts of the model printed out fairly well with exception to the windows coming out of part 2 of the model.

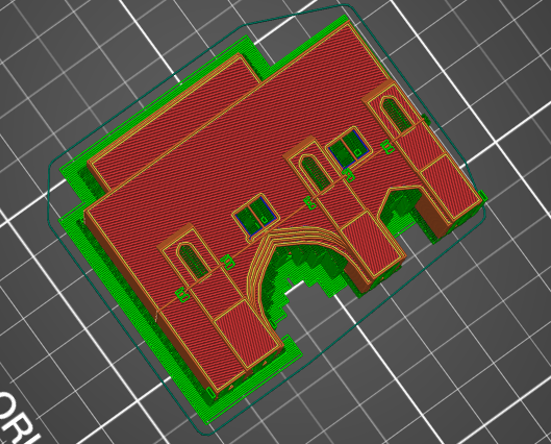
9 College street was a bit more complicated as it had an underground portion that would lead to a print that would not be able to sit flat. In addition to this, there was a large white rectangle that was cutting through the entire model.
To fix this, I created a large blue rectangle which would be subtracted from the model removing anything contained within it.

I then uploaded this to PrusaSlicer and unfortunately, the print time came out to be 12 hours. To solve this was quite simple as all I had to do was remove the roof and print it separately. The roof itself would then take 4 hours 10 minutes to print with the rest of the building taking 4 hours 52 minutes.

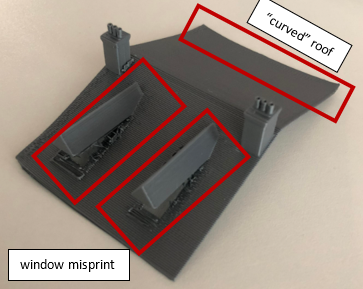
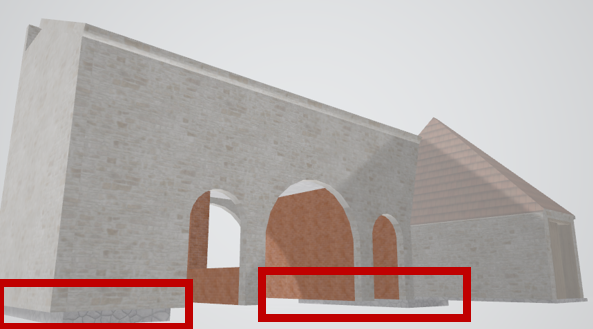
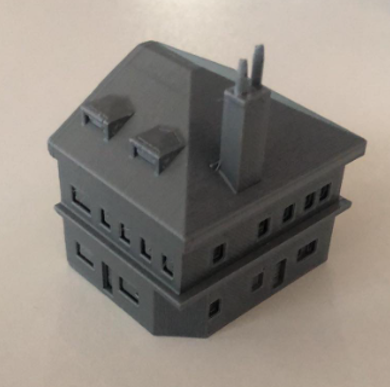
The building portion of this model came out quite nicely and similarly to 8 College Street, came out rather large. Unfortunately, the roof had a few issues. The ends of the roof seemed to bend upwards a little bit but the main issue is that the windows and area surrounding it just didn’t print whatsoever. Due to time restraints I could not reprint this with fixes in place. I also didn’t like how the windows came out on the main body of the building and by removing them, it made the building look much worse.
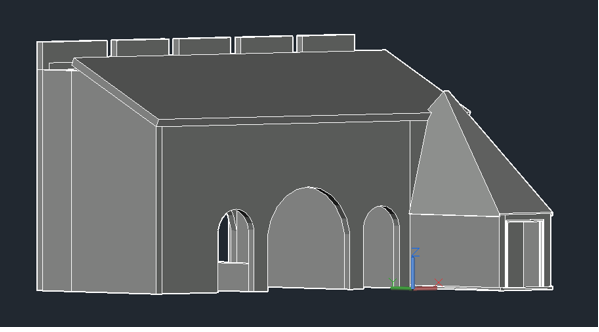
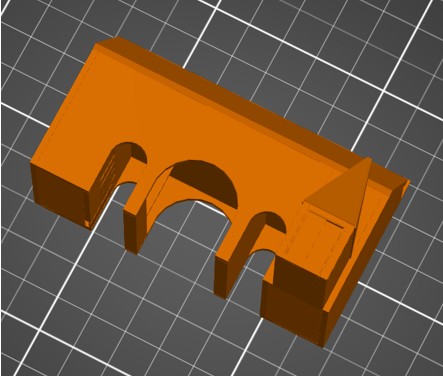
The next model was the Medieval West Gate. This model was very straightforward as it required no editing whatsoever other than scaling it accurately. I transferred the DWG model into Prusaslicer and flipped it on its back for a quicker print (5 hours 9 minutes).
The model came out very cleanly and I was very happy with the final result of the print.

St Swithun’s Kings Gate was not quite as simple as straight away I noticed an issue with it. This being a layer that was uneven to the rest of the gate.
Luckily this was an easy fix as this layer was separated when I opened it as a DWG. Because of this, it could easily just be removed with the delete key.
From here, transferring to PrusaSlicer and printing were both very simple processes and the final model came out quite cleanly after 3 hours 23 minutes. I managed to get it down to this time by flipping the model on its back.

The final print was the William Walker pub. Luckily this was also quite a simple print in the end with little to no editing needing to be done. Once the model was scaled, I put it into Prusaslicer and placed it on its back to save time. This resulted in a print time of 3 hours 34 minutes.

This model was possibly the one I was the happiest with. All the detail came out perfectly. The only slight issue is it felt a bit small to the other models. Even so, I compared the door size to the door on the printed St Swithuns Gate model as a comparison point and they were very similar in size.
With all this being done, I feel I have learned about the 3D printing process and feel a lot more confident in my ability to print in the future. If I were to change anything or redo this project, I would most likely try and use my time better so that I may be able to edit the models that I was unable to model. I would also redo the prints that I was not as happy with and maybe try and find a more accurate scale via either public documents or by measuring myself (where possible).